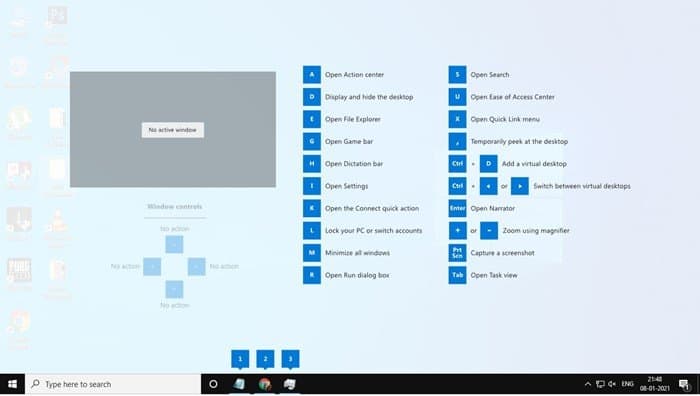
As of now, there are hundreds of Keyboard shortcuts available that you can use on Windows 10. For example, pressing the Windows Key + R opens the RUN dialog box, pressing the Windows Key + E opens the file explorer. For a list of most used keyboard shortcuts, check out the article – Keyboard Shortcuts Everyone Should Know However, the disadvantage of having so many keyboard shortcuts is that we tend to forget basic shortcuts. It’s actually not possible to memorize all the available keyboard shortcuts. Even if you somehow managed to memorize the most used keyboard shortcuts, at some point, you will forget those too.
Steps to use the Windows Key Shortcut Guide in Windows 10
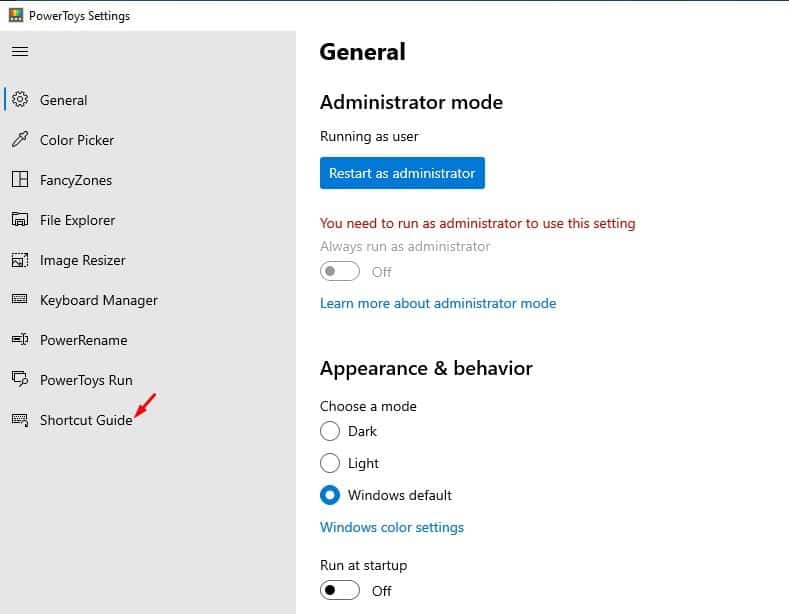
To deal with such things, Microsoft introduced a Windows Key Shortcut Guide on PowerToys. The Shortcut Guide module of PowerToys overlays a display of all the Windows Key Shortcuts. You can use the Shortcut Guide as a reference whenever you forgot some major shortcuts. In this article, we will share a detailed guide on how to get an on-screen Windows Key shortcut guide on Windows 10. Let’s check out. Step 1. First of all, download & install PowerToys on your Windows 10. For installation, follow our guide – How to Download & Install PowerToys in Windows 10. Step 2. Once installed, launch the Powertoys. On the left pane, select ‘Shortcut Guide’
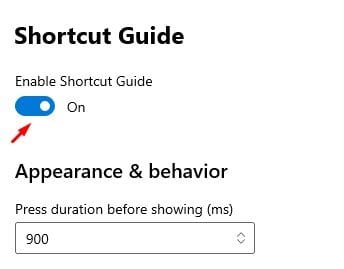
Step 3. On the right pane, toggle the switch for ‘Enable Shortcut Guide’ to ‘On’
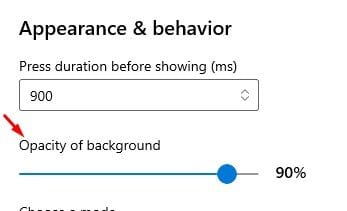
Step 4. Now scroll down and set the ‘Opacity of background’
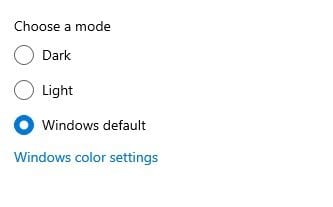
Step 5. You can even select the color mode between dark and Light.
Step 6. Once done, move to the desktop and hold down the Windows Key for a second. The Shortcut guide will pop-up.
That’s it! You are done. This is how you can use the Windows Key Shortcut guide on Windows 10 computer. So, this article is all about how to use the Windows Key Shortcut guide in Windows 10. I hope this article helped you! Please share it with your friends also. If you have any doubts related to this, let us know in the comment box below.
